Reminder, we have multiple actors in the flow:
flowchart LR
    controller[XBox Controller]
    phone[Smart Phone Browser]
    subgraph station[Shrimp Station]
        ui[Web UI]
    end
    controller-->station
    phone<-->ui

    shrimp[Shrimp]
    station<-->shrimp
Controller
The controller is rated at 400mA where the PI can output 100mA. More details on the possible issues here. So far the pi seems to be powering the controller just fine. If it gets complicated, I'll replace the controller with a control module in the web interface.
flowchart LR
    Controller-->|button press|Station-->|commands|Shrimp-->|voltage|motor
Web Interface
This is the place for feature creep 😎
Work items (look at me going full work on this):
- ui ↔ station connection over wifi (station in Access Point mode)
- station ↔ shrimp connection (over ethernet direct-connect)
- station ➡ ui video feed setup (side channel)
- station ➡ ui controller feedback (web socket)
sequenceDiagram
    participant ui as Web UI
    participant station as Station
    participant shrimp as Shrimp
    ui->station: connexion
    station->shrimp: connexion

    activate shrimp
    shrimp->>ui: video feed
    station->>ui: controller feedback
    ui->>station: button presses
    station->>shrimp: commands
    deactivate shrimp
station ➡ ui controller feedback (web socket)
This was fun! After a failed experiment with the camera (spent a night trying to make it work despite a broken cable), I turned to what I could make work while waiting for a replacement cable.
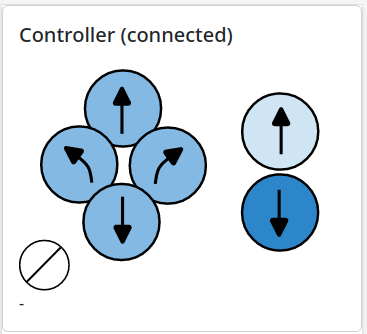
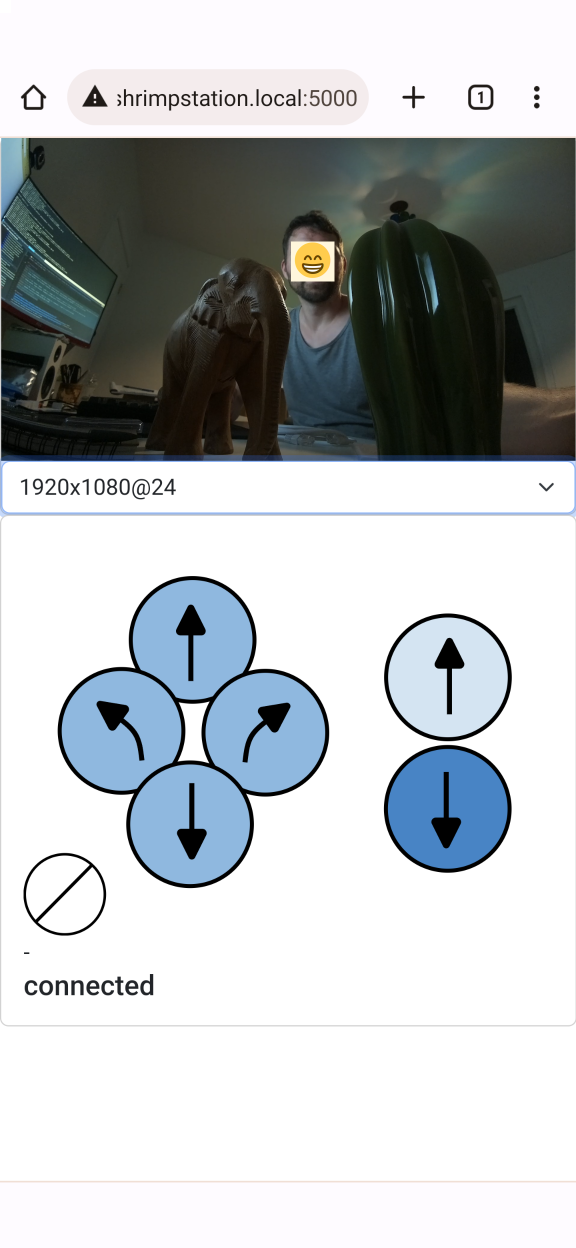
I first tried my hand at good old html image maps:
<img src="..." usemap="mymap">
<map name="mymap">
    <area shape="circle" coords="45,111,43" @click="...">
</map>
But the support for scaling coordinates to the screen size is non-existant, so I could not test on desktop before pushing to mobile; well at least I could not make it work, so I turned to the scale-agnostic SVG format:
<div
        @press.window="mouseDown($event.detail);"
        ... other events
    >
    <svg>
        <!--inline svg-->
        <g id="groupOfInterest"
            label="left"
            onpointerdown="window.dispatchEvent(new CustomEvent('press', {detail: this.getAttribute('label')}))"
            onmousedown="window.dispatchEvent(new CustomEvent('press', {detail: this.getAttribute('label')}))"
        >
        </g>
    </svg>
            </div>
Events raised by individual SVG shapes or groups are sent to the window, then caught back in the div that contains the SVG, and hooked to js callbacks. Thanks AlpineJS for making all this pretty easy. Events are then converted to commands and conveyed to a websocket for the station to relay to the shrimp.
A nice little project, but as a software dev, I know this is the easy part!

station ↔ shrimp connection
The shrimp runs a lightweight python client that connects to the station and receives navigation commands and video feed control commands, starting with the critical start/stop streaming from the camera. This part of the documentation was useful to get the streaming started. TLDR:
libcamera-vid -n -t0 --inline --listen --width 400 --height 300 --framerate 24 --level 4.2 -o tcp://0.0.0.0:6001
Here's the full flow:
- the web UI requests a stream to the station
create_videofeed_outendpoint - the station tells the shrimp to start streaming the camera with ffmpeg
- the station starts a
websocatprocess that reads from the ffmpeg's tcp socket stream and serves it over a websocket - the station returns the websocket url to the web UI
- data from the websocket is fed to a
<video>element, through jmuxer (raw h264 -> whatever the browser can display)
It's highly inspired from what dans98 does in their pi-h264-to-browser project, but with the following differences:
- the camera feed is read by ffmpeg rather than custom python picamera2 code
- the camera feed is served online through a websocket with websocat rather than a custom Tornado server & websocket
So apart from streamlining a bit of custom code, it's pretty much the same. I do feel more confident reusing established binaries to process data stream, rather than pyton code, simply due to how slow pyton can be, and how little CPU & RAM are available on the PI Zero (1GHz & 512MB).
Another very interesting avenue is using ffmpeg in the browser, possible with the ffmpeg wasm project. I didn't go that route because I found the other one first, but if it really is similar to when using it in the terminal , this should really be the simplest way forward [1].
In the meantime, I've got this going for me, which is nice :)

Streaming Notes
# desktop webcam to desktop
ffmpeg -r 24 -f video4linux2 -i /dev/video0 -f h264 -preset ultrafast -tune zerolatency -x264opts keyint=7 -movflags +faststart -r 24 -fflags nobuffer tcp://0.0.0.0:6001?listen
ffplay -fflags nobuffer -flags low_delay -framedrop -avioflags direct -fflags discardcorrupt -probesize 32 -sync ext tcp://0.0.0.0:6001
# pi to desktop
libcamera-vid -n -t0 --inline --listen  --width 400 --height 300 --framerate 24 --level 4.2 -o tcp://0.0.0.0:6001
ffplay -fflags nobuffer -flags low_delay -framedrop -avioflags direct -fflags discardcorrupt -probesize 32 -sync ext tcp://shrimp.local:6001
# pi to desktop then tcp to ws
libcamera-vid -n -t0 --inline --listen  --width 400 --height 300 --framerate 24 --level 4.2 -o tcp://0.0.0.0:6001
websocat --oneshot -b ws-l:0.0.0.0:6002 tcp:192.168.1.9:6001
#https://github.com/vi/websocat
#https://github.com/samirkumardas/jmuxer
Networking
Now all this is tested with rpis connected to the LAN over wifi. Two more steps need to be taken:
- connect both pis over a direct ethernet connection, using usb ethernet hubs
- make the shrimp station open its own wireless access point for my phone to connect to it when the home wifi is not available
Direct ethernet Connection
After each hub was connected and their interface declared:
# /etc/network/interfaces.d/eth0
auto eth0
iface eth0 inet static
address 10.0.0.$i
netmask 255.255.255.0
# with $i a different value for each pi
Somehow rebooting the pi itself, even unplugging it, did not make the interface appear. I had to unplug/replug the hub for the iface to show up 🤷
Connectivity can be tested with a simple ping 10.0.0.1 from the device at 10.0.0.2 and the other way around too.
Notes
[1] turns out the Web Socket API is not available in WASM. More details there.
References
- picamera2 manual
- picamera2 capture_stream example
- ffmpegwasm to transcode the shrimp h264 stream into something palatable for my phone's browser
- js mpeg decoder
- VideoJS MPEG-DASH. Couldn't make it work with h264 input, and at this point I'm still trying to avoid transcoding on the fly, to save CPU/battery life.
- python-ffmpeg-video-streaming , another controller for ffmpeg, not much info about getting the stream back on screen in a webpage
- the uv4l seems to simplify this kind of workflow as well